Putting on a Show
Venue Information
Marketing Your Show
Making Your Marketing Collateral
We recommend beginning work on your image and poster eight weeks out from your season, so that it is ready to be released six weeks out.
Key steps to creating your collateral:
1. Work with a graphic designer and a photographer
2. Create your image:
Make sure that the image is well-lit and in focus so it’s crisp and clear. Make sure you take a range of options (profile, landscape etc) with a good amount of negative space around the subject/s so that you can crop it easily into different sizes (banner image, square image etc), and so that you can add text around the main subject of the image for your poster.
It’s a good idea to read through our poster guidelines and develop a concept for your poster prior to your photo shoot. You may want to tell your photographer the different crop sizes you will require prior to the shoot as well (see below).
3. Edit your image:
This could be adding special effects, touch-ups, a different colour background, or just improving the light balance of the image.
4. Supply Basement with your image in the following formats and sizes. Please label with the image labels shown below. Please make sure that you provide all six images – we do need the different crops to make your event live.
A. Your Uncropped, Clean Image, in High Res
No text or logos added. We are sometimes asked for this by media outlets for their publications, or we may use it to include in Basement promotional material. This needs to be at least 1MB to be print quality, but please send through the highest resolution you have.
Image label: Bment_highres
B. Your Hero Image for the Basement website.
Do not add text or logos to the website image as it may be cropped out on certain devices. Provide the image between 1-5MB. It can be cropped to landscape, portrait or square - whichever you prefer. Image label: Bment_web
C. Image Cropped for iTicket (can include show title text):
- 1600x x 800h px. Image label: iTicket_v1
- 540w x 630h px. Image label: iTicket_v2
- 500 x 500 px. Image label: iTicket_v3
5. Create your poster:
We recommend working with a graphic designer. If you are a Hire For Nothing artist, you will need InDesign to use our Poster Template and follow the instructions in our Poster Guidelines. Both can be found in Poster Templates section of the Artist Base. If you don't have access to InDesign, please chat with Basement's Marketing & Relationships Manager.
You will need Basement's font for your poster and flyer (there is no required template for flyers, just Basement's logo and font). You can download the Founders Grotesk in the Font section of The Artist Base. Please don’t use this font on anything outside of your Basement collateral, it has been purchased solely for that purpose and will be considered a breach of copyright if used outside of that purpose.
If you want to put a poster up at Basement, it must be A2. Please print two copies and hand them to the bar staff. They will put one up in the bar and the other in the bathroom.
6. Send poster to Basement's Marketing & Relationships Manager for sign-off
Make sure you have carefully proofed it, check that the dates are correct and that you’ve allowed at least 48 hours for Basement to feedback and edits to be implemented.
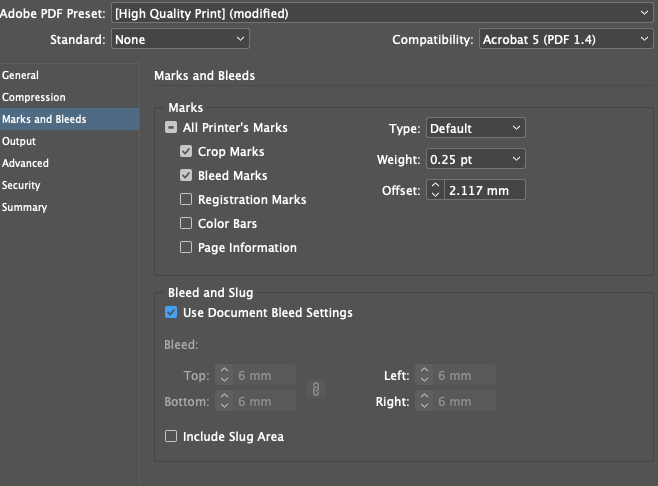
If you are a Hire For Nothing artist, when you're ready to send the final A2 to Basement's Marketing & Relationships Manager for printing, make sure you export it in CMYK and include printer marks crop and bleed.
7. Print and distribute:
If you are going to print additional posters to put up around town, book your print and distribution dates at least a couple of weeks before you want them to go out.
Remember all posters/flyers and images need to be signed off by Basement Theatre’s Marketing & Relationship Manager before being publicly released or printed.